
Build a tech pack that supports a useful quotation
A leather jacket tech pack turns a design idea into a shared product reference. It connects the garment's appearance with its components, measurements, artwork and quantity plan. For a B2B enquiry, its purpose is practical: make the requested version clear enough for the buyer and supplier to discuss the same jacket.
You can begin with a catalogue product, an existing garment or your own sketches. The package can be simple at the first discussion, provided the information is organised and the open choices are visible. Develop it as decisions are made, keeping the accepted version easy to identify. The approach below is a buyer worksheet, adaptable to a leather, PU or mixed-material design.
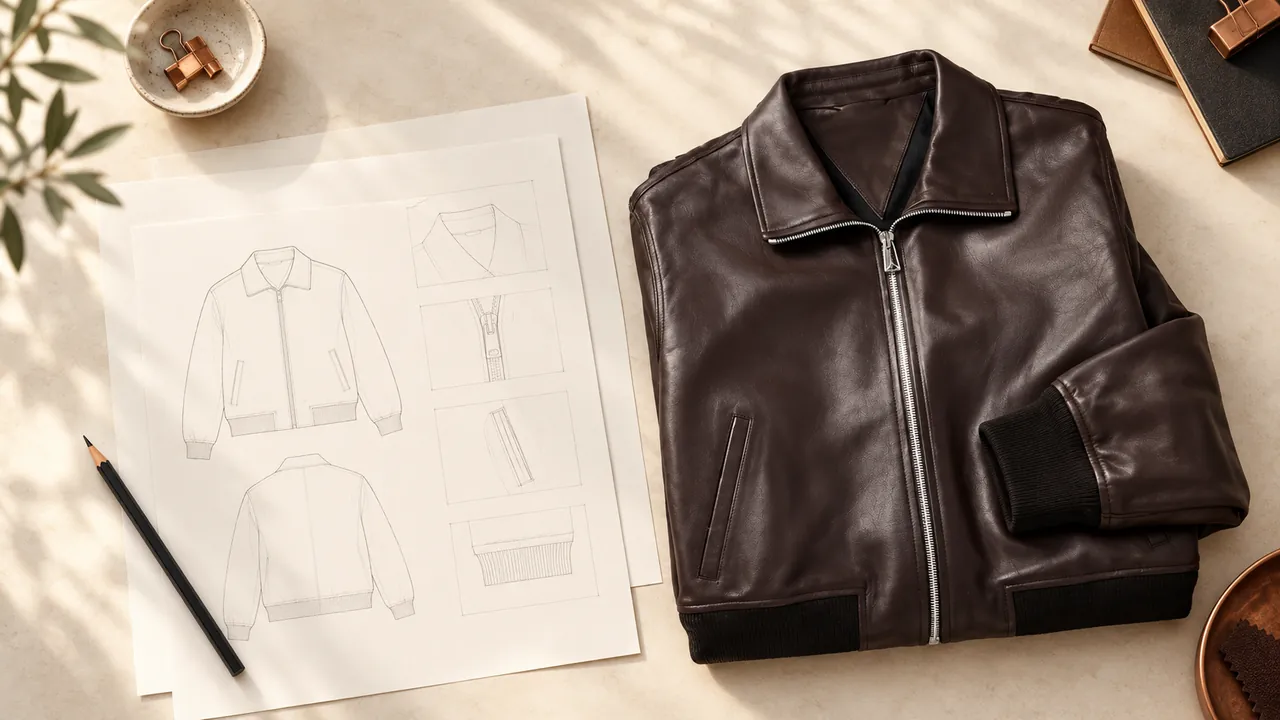
Use the custom jacket development guide for an overview, then work through each part of the brief before sending the current package.
1. Identify the starting garment and the requested changes
Begin with a short project description: who the jacket is for, the intended market, the design direction and the quantity being considered. Give the project a recognisable name. If you are adapting a catalogue garment, paste its exact product URL and record the selected colour and size reference. For a new concept, provide front and back sketches that show the intended silhouette.
Separate the details you want to retain from the changes you want to explore. “Keep the stand collar and zip front; review the sleeve proportions and add a back graphic” gives the discussion a useful shape. Mark each change on the relevant view rather than relying on a general mood image. Add close-up references when a pocket, fastening or seam needs more explanation.
A reference image communicates appearance; the written brief explains what you are requesting. Keep both together. Where two references contribute different details, name the part taken from each so the recipient can follow the design logic without choosing between them.
2. Map shell, sleeves, lining, filling and trim
Create a component list before compressing the design into a single material name. A jacket may combine a body material with different sleeves, rib, pocket bags, lining and decorative edges. Assign each material choice to the part it describes. This is especially useful for varsity and mixed-panel designs, where the visual contrast is central to the brief.
Record the required substrate, colour and surface finish separately. If you want an embossed surface, explain the desired pattern alongside the underlying material. If a chosen product already describes a material or ordinary functional feature that matters to the project, carry that requirement into the brief with its original scope.
| Component | Buyer information to record |
|---|---|
| Body and sleeves | Material identity, panel allocation, colour and finish reference |
| Lining and filling | Composition, construction and the component each statement covers |
| Collar, cuffs and hem | Main material, rib or other treatment; attachment details |
| Trims and hardware | Fastenings, pocket details, decorative parts and accepted references |
The materials guide provides a component-based starting point. Use the table to organise the selected version, rather than treating every catalogue option as part of one garment.
3. Describe the fit with repeatable measurements
Include the size label of the base garment, the intended silhouette and the clothing expected beneath it. Add a finished-measurement sheet with a consistent unit. Define the points and tape path for chest, body length, shoulder, sleeve and hem measurements relevant to the construction. Mark whether each entry is a flat width, a circumference or another defined dimension.
Keep the measurement method beside the number. A sleeve measured from a shoulder seam and a sleeve measured from the neck point describe different paths; the diagram should make your chosen method clear. For a dropped shoulder or raglan construction, adapt the landmarks to the actual garment instead of importing an unrelated sheet.
Then list the requested labels and quantities. Preserve the product's exact labels in the enquiry, and keep target garment measurements separate from the wearer's body measurements. Review the range and grading requirements as part of the development discussion. The sizing guide helps prepare that sheet.
4. Give every artwork element a position and a version
Make an artwork schedule for each logo, graphic, patch and label. Include the file name, requested treatment, finished dimensions, colour reference and position on the jacket. Use an annotated front, back or sleeve view to show the location, then add a measured placement reference so the artwork can be discussed consistently across sizes.
For example, the catalogue's black stand-collar zip jacket lists embroidery, silk-screen printing and logo positions. A focused enquiry names the method and position being requested for the chosen version. The tech pack then connects that request to its actual surface, dimensions and proof.
Keep the source artwork and the reviewed proof identifiable as separate files. If the logo changes, update the artwork schedule and the revision note together. For labels, record the text, size identifier, dimensions and placement, along with any market-specific information that belongs on the selected garment.
5. Add intended use, care and market information
State the product's intended use and the features important to that use. Weather-related characteristics, movement, layering or decorative effects can be part of the brief when they are relevant to your selection. Where the project needs a named performance level or document, put that requirement beside the garment or component it covers.
Include the intended sales market and a draft label schedule in the same package. As one market-specific reference, the UK government's textile-labelling guidance addresses fibre-content information and different-component content for textiles in England, Scotland and Wales. Use the rules applicable to your actual product and destination when preparing the final label.
Keep the care requirement connected to the full construction, including artwork, lining and trim. The accepted version should explain the garment that is being developed, with its intended presentation and use, so the sample review can examine the complete combination.
6. Separate the garment specification from the commercial request
A quotation becomes easier to assess when the product requirements and commercial questions are both clear. Add quantities by style, colour and size, the requested sample scope, packaging needs and the delivery destination. Identify your target review dates and the date associated with the requested delivery milestone.
Ask the quotation to identify the product version, quantity basis, included development work and any separately charged items. Keep sample, artwork setup, packaging and freight lines distinguishable where they apply. Record the quotation currency and validity alongside the price so a later revision has a clear comparison basis.
These are project discussion points. Relia's universal minimum quantity, sample charges and delivery terms are not set by this worksheet; the relevant arrangements belong in the quotation for the selected project. Bring the finished specification to the B2B enquiry page so those commercial details can be considered against the actual garment.
7. Keep one current pack and a short decision log
Give each revision a date or version identifier and keep the document names consistent. A useful decision log says what changed, where the change appears and which earlier instruction it replaces. This keeps a revised sleeve measurement from being separated from the artwork or component version that it was approved with.
Organise the pack in the order another person will use it: project summary, reference views, component list, measurements, artwork, labels and packing, then the open decisions. Place the current files together and keep earlier revisions in a clearly marked archive. The aim is a manageable reference, rather than a collection of messages with competing instructions.
When a sample is reviewed, record its identity against the same pack. Mark details as accepted or requiring revision, and carry the agreed updates into the next version. The sample approval guide explains how to connect the physical garment with the written decisions.
Work through one design before extending the range
Consider a buyer adapting a stand-collar zip jacket into a branded collection. The first page of the brief identifies the catalogue reference and the outline to retain. A change list then separates the proposed back artwork, label request and fit adjustments. This is an illustrative enquiry structure, with the actual choices supplied by the buyer.
The component sheet names the intended body, sleeves, lining and filling. The measurement sheet identifies the base label and the requested body and sleeve targets. The artwork schedule carries the back design file, dimensions and placement. The commercial request adds quantities and the destination. Each document answers a different part of the same project.
Before extending the brief to another silhouette, review which details are shared and which belong to this garment. The artwork identity might continue across the range, while its dimensions or position need a separate discussion on a varsity body. The size labels may also be shared while the finished measurements differ.
A short handoff meeting can follow four questions: is this the intended garment; are the requested changes visible; does every file describe the current version; and what decision is needed next? Record the answers beside the current package. This turns a broad idea into a manageable sequence of design choices and gives the next enquiry a stronger starting point.
Before sending: a compact handoff checklist
- The exact garment reference and requested changes are identifiable.
- Every component statement is attached to its part of the jacket.
- Measurement units, landmarks and size quantities are consistent.
- Artwork files, positions, dimensions and proof versions match.
- Care, market, packaging and project requirements are grouped clearly.
- The quotation request names quantities, destination and relevant milestones.
- The current revision and the questions still to discuss are easy to find.
A strong first brief leaves room for a useful discussion while keeping the design intent intact. Send your project to Qingdao Relia Jacket Co., Ltd. with the current reference package, and explain which decisions you would like to work through first.